


Chemical mixing is a crucial part of agricultural spraying. Regardless of the type of herbicide, fertilizer, or biologic you use, effective mixing requires proper equipment to ensure precision, safety, and minimize waste.
The main tool to add mini-bulk chemicals is typically a 12-volt diaphragm pump and electronic meter. However, what if I told you there was a way to mix all your bulk chemicals without multiple 12-volt pumps? Let’s look at the pros and cons of the different options and explain how you can use one pump and meter for multiple products without recalibration or disconnecting and connecting hoses.
Chemical Mixing With 12-Volt Pump and Meters: The Good and the Bad
Anyone mixing chemical batches for a sprayer is likely familiar with 12-volt chemical pumps and meters. These are necessary to add products to your sprayer batches either directly or through an inductor cone. These pumps are effective, but they have several drawbacks including maintenance, limited flow, and of course cost.
This method also limits your efficiency because you must calibrate multiple meters and add product one at a time carefully watching the meter until you have added your desired amount. You must shut off the valve, and pump, and then move on to the next product. There is also the constant handling of the hoses and meters, moving them around as needed, which can get messy.
More sophisticated systems, such as the Dura Auto Batch System, allow you to inject each product directly, eliminating the need to handle each one. They will even allow you to set the amount of product you want and automatically shut off the pump once that amount has been reached.
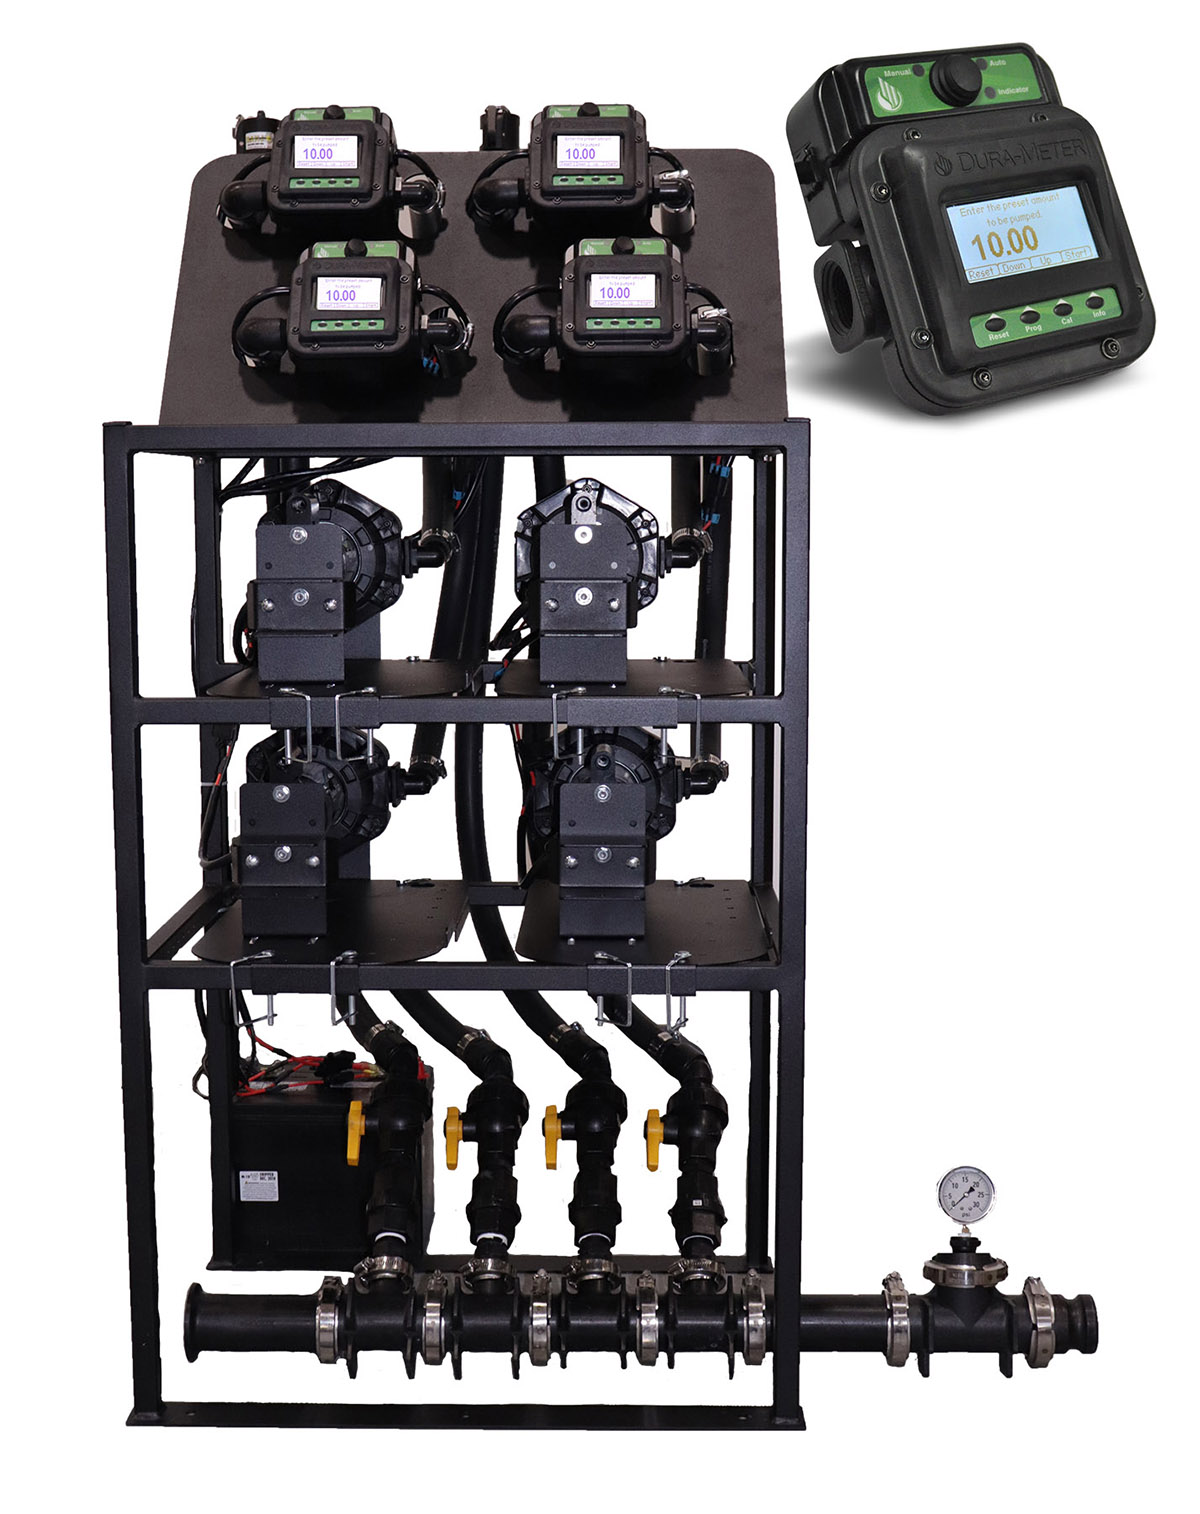
This method definitely works well, and it is much more efficient. However, it does come with added cost and you still have the potential for pump and meter failure due to the nature of handling agrochemicals.
There are also automated systems to mix your chemicals without 12-volt pumps and meters. These provide the most streamlined option but they are by far the most expensive. The idea of being able to efficiently add chemicals while accurately measuring them without multiple 12-volt pumps and meters is certainly appealing, but how can you accomplish this without spending thousands if not tens of thousands?
The good news is that with the right transfer pump for the carrier liquid, meter, and inductor setup, this can be done!
Ag Chemical Mixing Setup Without 12-Volt Pumps
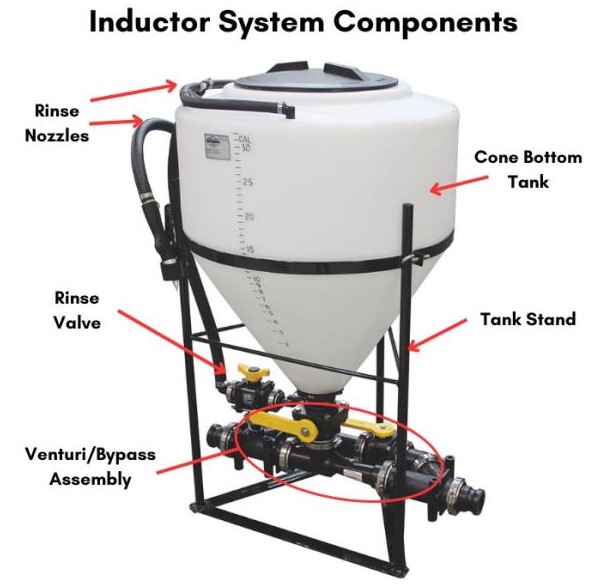
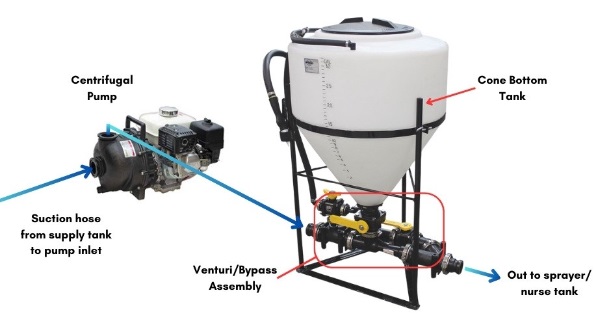
How exactly will one pump handle all the chemicals or additives? Instead of a 12-volt pump on each chemical tote, you can use the suction from a Venturi/inductor to pull product from each tote. This is the same type of inductor assembly that you would find under a cone bottom tank. (If you are not familiar with inductor tanks with a venturi, our guide on chemical inductors will get you up to speed.)

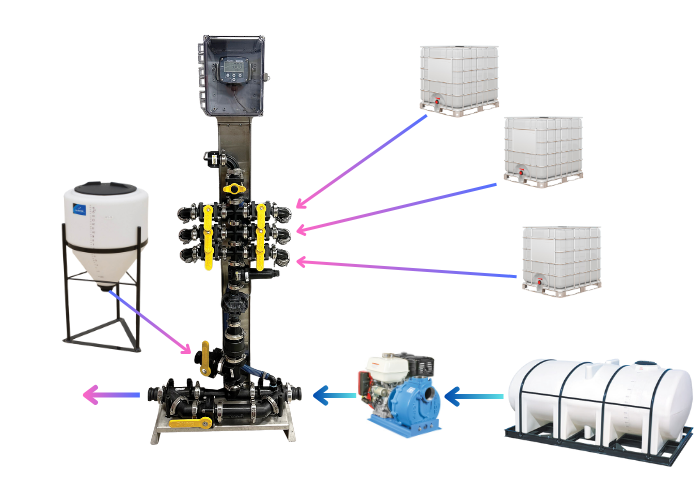
In the following setup, instead of a cone bottom tank, we have a manifold stacked on top of a gear meter that can measure each product accurately. Each product is drawn into the manifold and through the meter, then feeds into your main carrier line into the sprayer or nurse tank.
Everything is plumbed together allowing you to add each chemical one at a time. You simply open the corresponding ball valve for the product you want to add and watch the flow meter display until the desired volume is reached. Then close the valve, open the rinse valve to flush the system, and reset the meter before moving on to the next product.
There are a couple of important aspects of this setup that make it work: 1) the gear meter handles all the chemicals without the need for recalibration, and 2) suction is needed to pull chemical from each tank.
The meter is pretty straightforward, you must ensure you are using a meter that can handle the different agrochemical viscosities. For this, an oval gear meter is required. It is the suction aspect that gets a little more tricky.
There are two distinct ways one can generate the required suction: You can use the suction from your transfer pump (typically a 2 or 3-inch gas-engine driven pump) or you can use suction from an inductor. These two methods can effectively be used to move your bulk chemical but there are key plumbing differences for each one.
Dultmeier sales offer prebuilt units that work with either method. We will examine those later in this article, but first, let’s walk through the differences between each one and consider the pros and cons of each.
Option #1: Using Suction of Your Transfer Pump
The simpler of the two methods is to use the suction created by your transfer pump. The pump is installed in your main carrier/water line. Each hose from your mini-bulk tanks is plumbed into a manifold. The outlet of the manifold is connected via a “T” fitting into your carrier line. All of the liquid, chemical, and water, is pulled through the pump and into the sprayer or nurse tank.
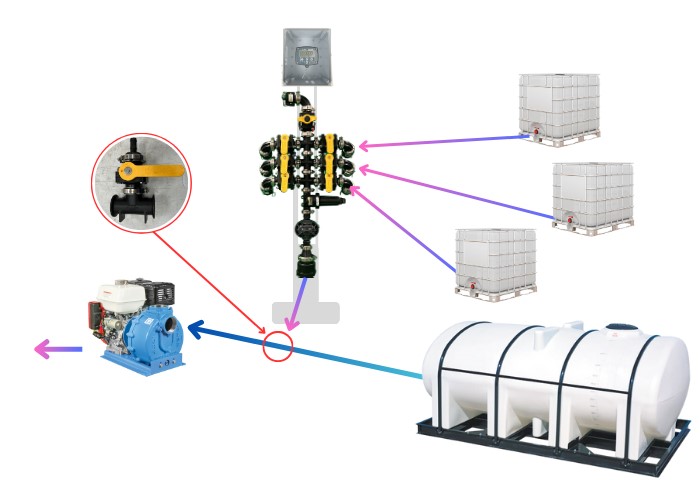
*Using the suction of a centrifugal pump to pull chemicals from the shuttle/mini-bulk tanks.
Required Components
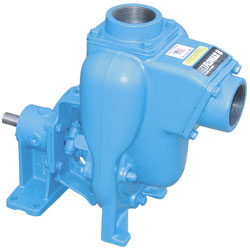
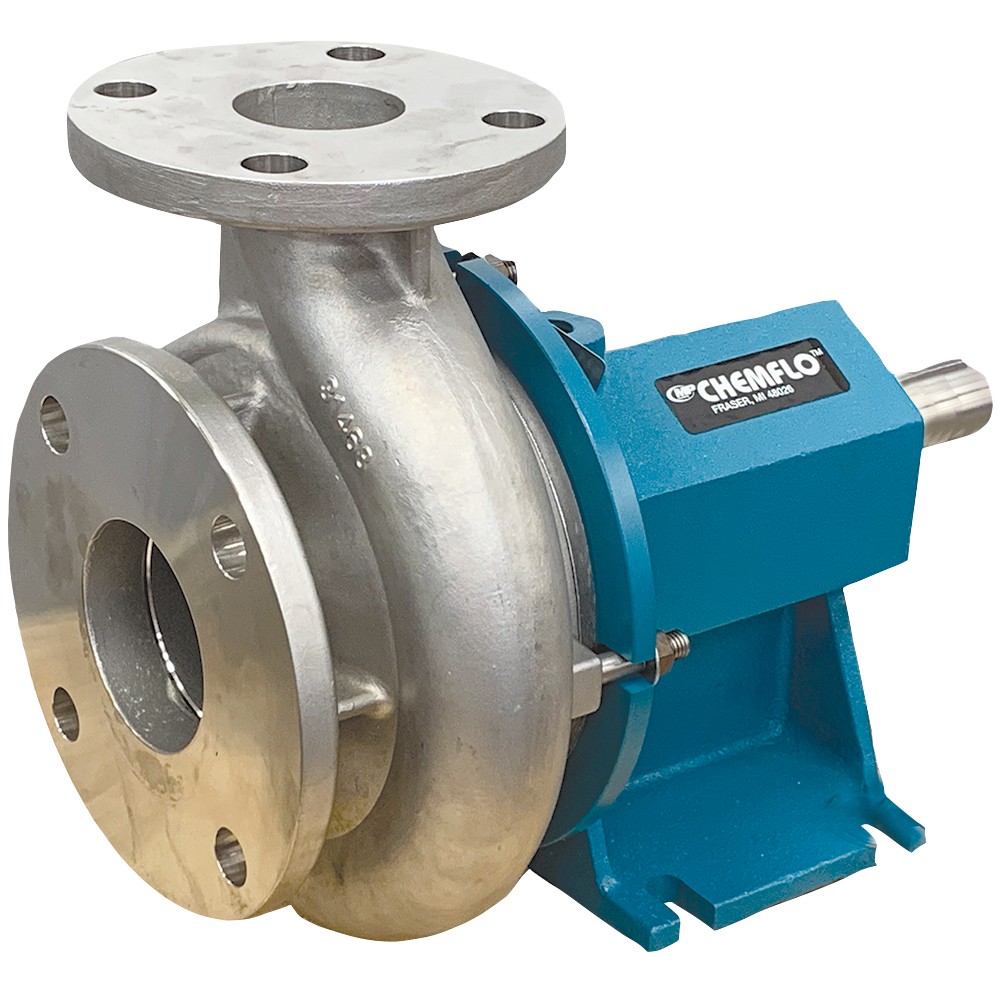
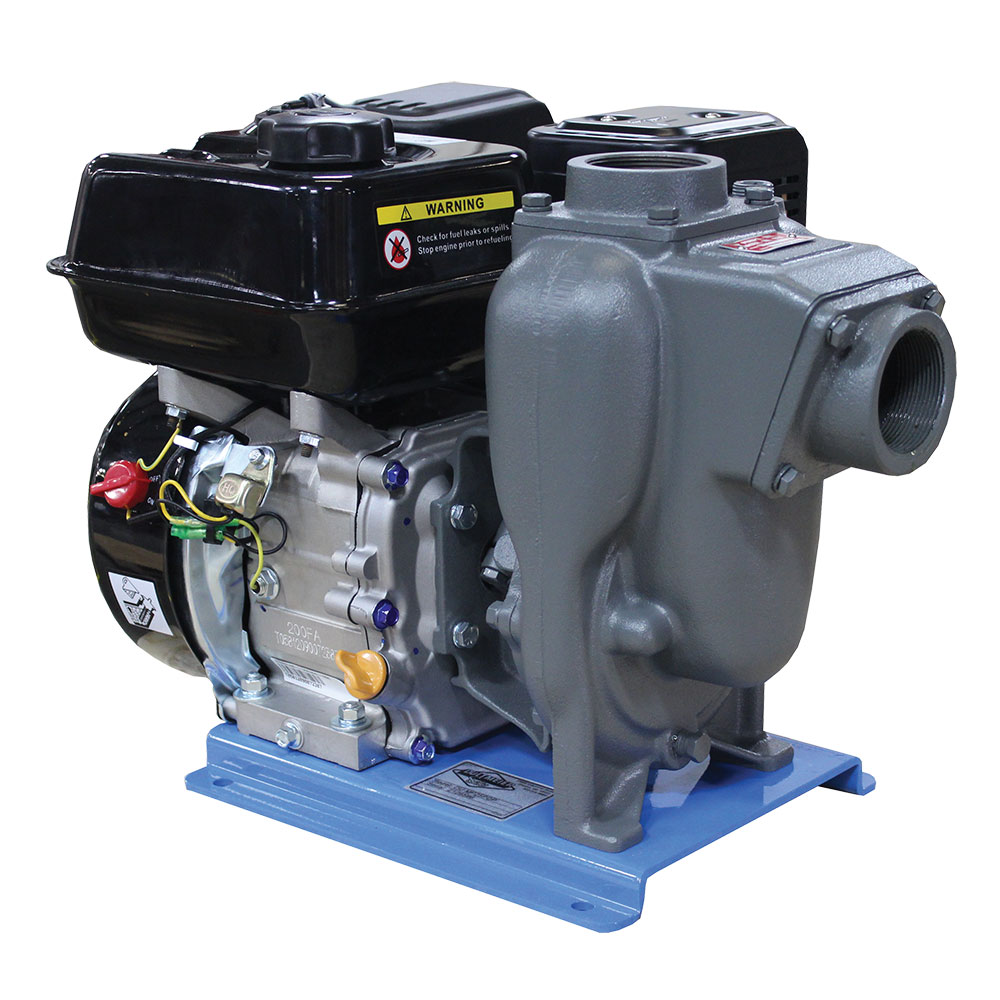
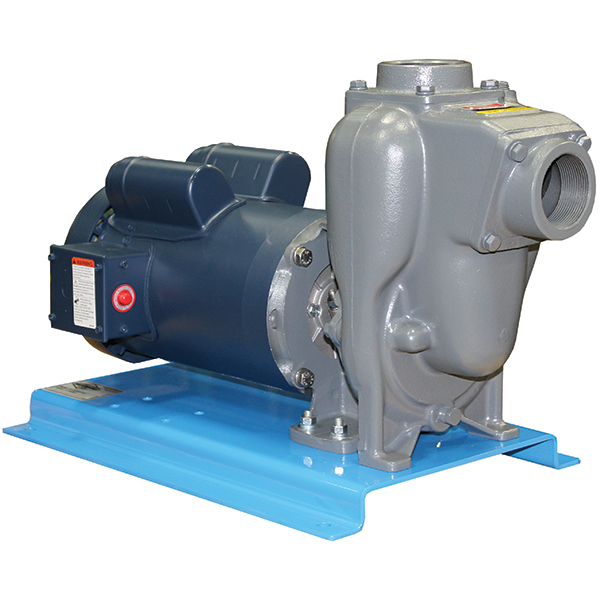
- 2-inch or 3-inch Engine driven Centrifugal Pump (Preferably a “Wet Seal” Pump)
- Oval Gear Meter
- Flow Meter Display
- Poly “Tee” Fittings for manifold
- Ball Valves
- Hose
- Check valve
Advantages of using suction from your pump
- Lower overall cost
- Simple to setup
- Amount of chemicals you can add is not limited by the volume of the carrier that is pumped
Disadvantages of using suction from the pump
- All the chemical goes through the pump, potentially causing pump damage over time
- Potential to introduce air in the pump or starve the pump of liquid, resulting in seal failure
- Cannot use the pump to provide fresh water for rinse
Option #2: Using Venturi/Inductor System
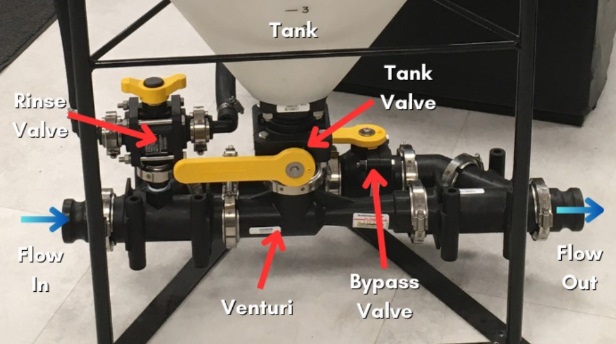
The second method to draw your chemical into your system with your transfer pump is to utilize a venturi. The pump pushes the water/carrier through the venturi and this creates suction that can pull chemicals from the mini-bulk tanks and into your manifold then through the venturi. In this setup, there is no chemical going through the pump.
The suction is created by the venturi and the venturi is located on the discharge side of the pump. The pump can also provide rinse water because it is just pumping fresh water and not chemicals.
This would be a great option if you are already using a cone bottom mixing tank with an inductor venturi manifold on the bottom. You can plumb your chemical manifold into the bottom of your existing inductor cone. This will allow you to use the inductor assembly to suck product out of the cone bottom tank or your chemical manifold.
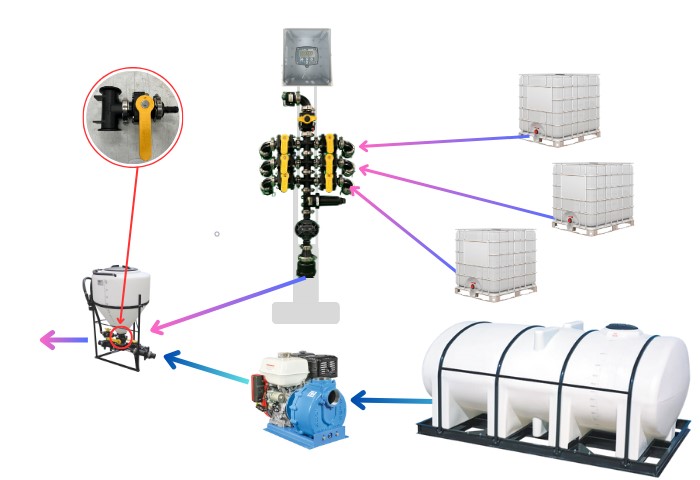
*Using suction created from water pumped through inductor assembly to pull chemical from shuttle/mini-bulk tanks.
Required Components
- 2-inch or 3-inch Engine driven Centrifugal Pump (Preferably a “Wet Seal” Pump)
- Inductor System with 2 or 3-inch Venturi Manifold
- Oval Gear Meter
- Flow Meter Display
- Poly “Tee” Fittings for manifold
- Ball Valves
- Hose
- Check valve
Advantages of using inductor assembly for suction:
- Only one pump is needed to create suction and provide rinse
- No chemical through the transfer pump
- No risk of starving the pump
Disadvantages
- More components required means more cost
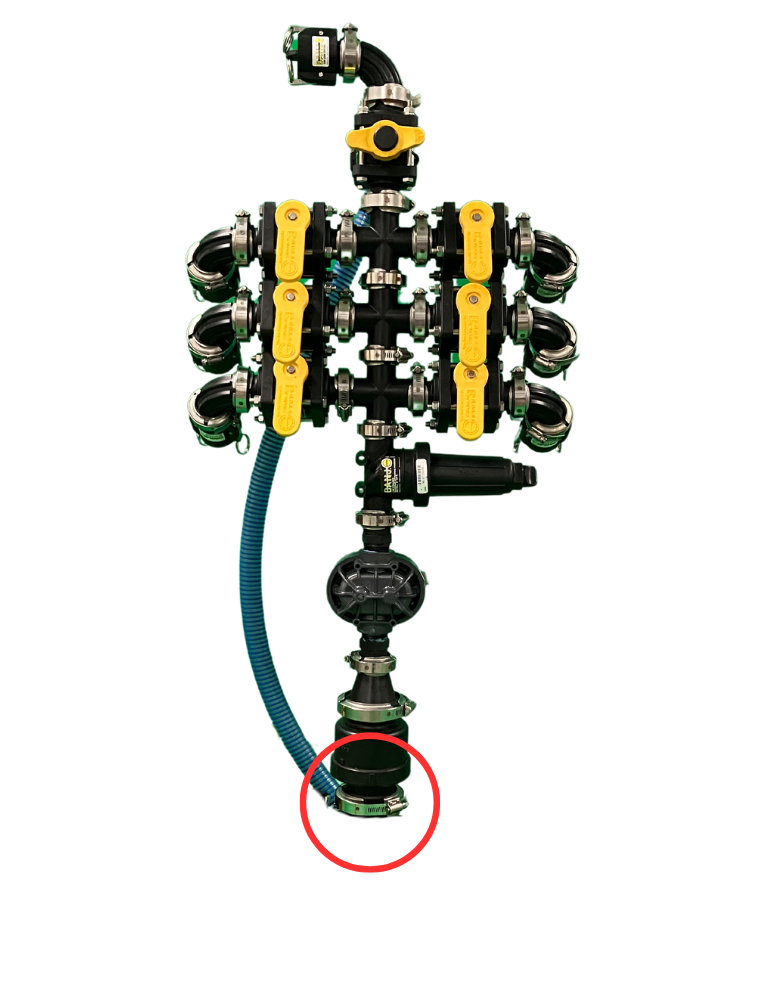
How to Construct Chemical Mixing Manifold
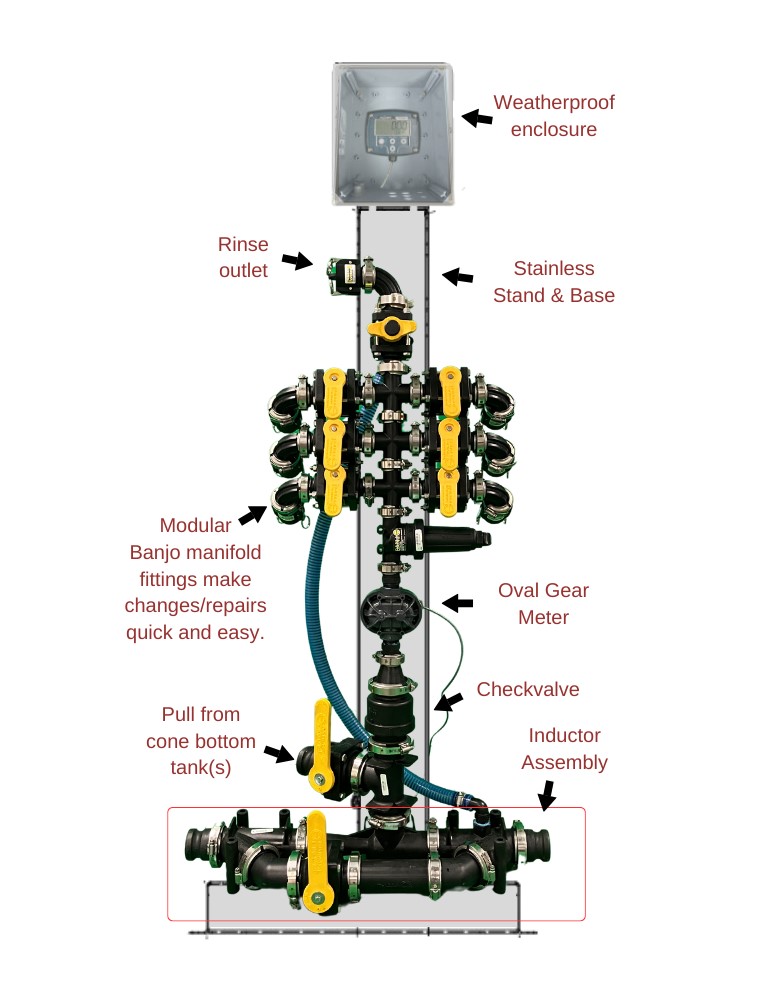
The central feature of this setup is building your manifold so your transfer pump can be used to pull chemical into the system and meter it accurately. This means we need a “stack” of “tee” fittings on top of a meter with a freshwater line plumbed into the top. It is recommended that a strainer is installed prior to the meter to protect it from debris.
No matter which of these methods you choose, there are a few key aspects to keep in mind to ensure your system operates effectively.
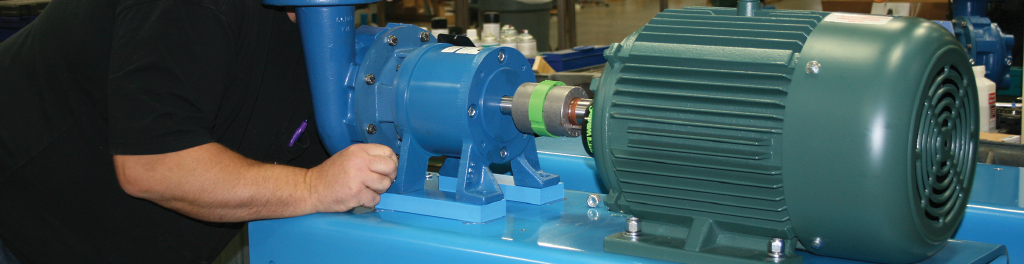
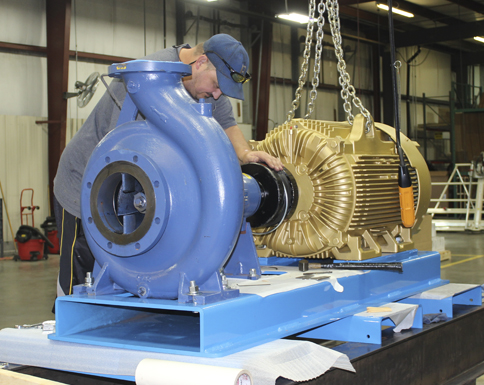
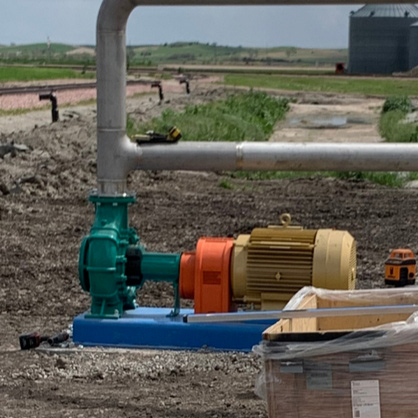
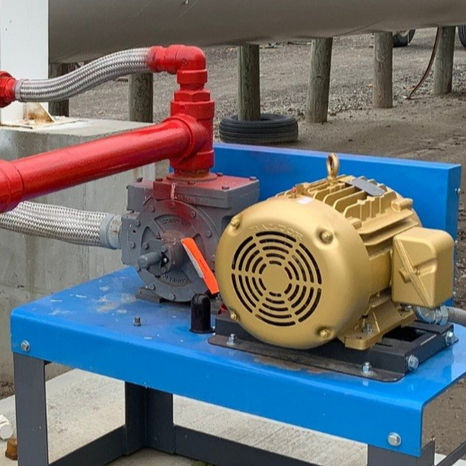
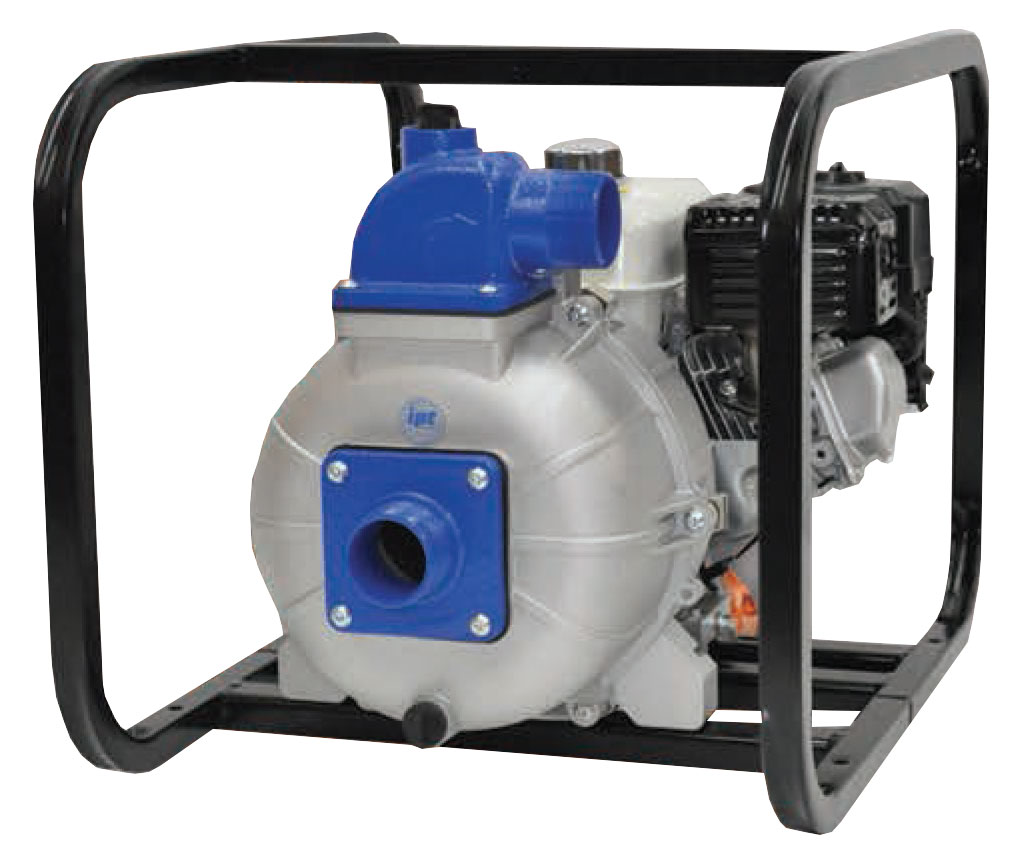
Pump Type
First off, the type of pump that you use matters. You can use a two- or three-inch pump. If your main carrier/water line is two inches, then use a two-inch pump. You need a three-inch pump if you want to use a three-inch line. It is important to ensure the pump has adequate horsepower to handle the demands of this application. Typically, this means 5 HP for a 2-inch pump and 9 or more HP for a 3-inch pump. Be sure to contact us if you need help identifying the right pump.
This is especially important if you are using an inductor with venturi. Your pump must meet the flow rate requirements for the inductor assembly to perform adequately. A two-inch pump used with a three-inch venturi assembly will not generate enough flow through the venturi to create the suction needed to pull products out of the cage tank/mini-bulk tank.
Furthermore, it is recommended that you use a centrifugal transfer pump with a “wet seal”. This type of seal can be run dry for short periods of time without causing any damage to the seal assembly. This is especially significant If you plan to use the suction of the pump to pull product from each tote. You don’t want to risk damaging the pump if a tank runs empty and the pump starts pulling air.
Plumbing
The hoses from the mini-bulk tanks/shuttles to the inlet of the manifold should be kept as short as possible. The suction of the pump is capable of pulling chemicals from about 20 feet with no problem but there is a limit. It is best practice to limit excess hose length, elbows, and other restrictions as much as possible so the system works efficiently.
Meter
Using one meter for all of your products requires a meter that does not need to be calibrated for each product and can handle liquids with different viscosities. An oval gear meter is capable of providing consistent measurements of flow rates for both high- and low-viscosity liquids
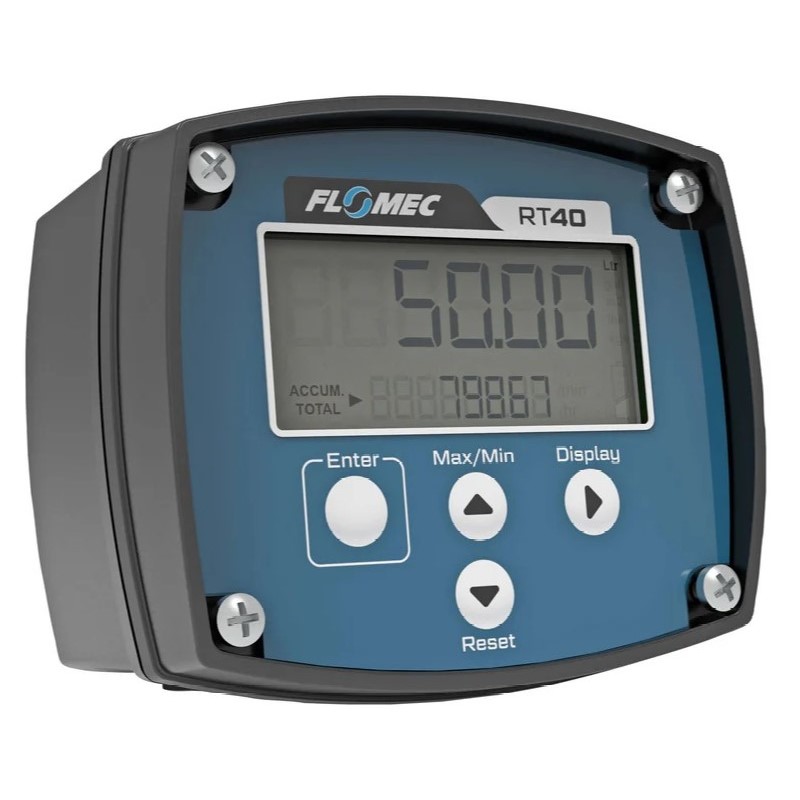
You can use a meter with a local display to monitor the amount of chemical as it is added. This may be hard see because the meter is located on the bottom of the manifold. GPI offers a meter with a remote display option that can be mounted anywhere that is more convenient to see as you mix your chemicals.
Check Valve
A check valve is necessary to prevent any chemical or carrier flowing back into the manifold. This is installed between the meter and a “Tee” fitting in the main water line.
Manifold Flange Fittings
Banjo manifold flange fittings are a style of plumbing connection that is much easier to work with than threaded fittings. These fittings are connected via a clamp and a gasket that provides a seal between the two flanges. Using these fittings saves a lot of time in the assembly and disassembly process. A single fitting can be isolated and removed/replaced without the need to unthread an entire group of fittings.
Rinse
A feature that should not be overlooked. The rinse valve on the top of the manifold/stack ensures that all of the product is flushed out before adding another. The rinse line can be plumbed in a number of ways. The rinse plumbing will vary depending on whether you are using the pump suction or a venturi.
If you are using the suction of the pump (without a venturi/inductor assembly), then you will require a second pump to supply fresh water to rinse out the system.
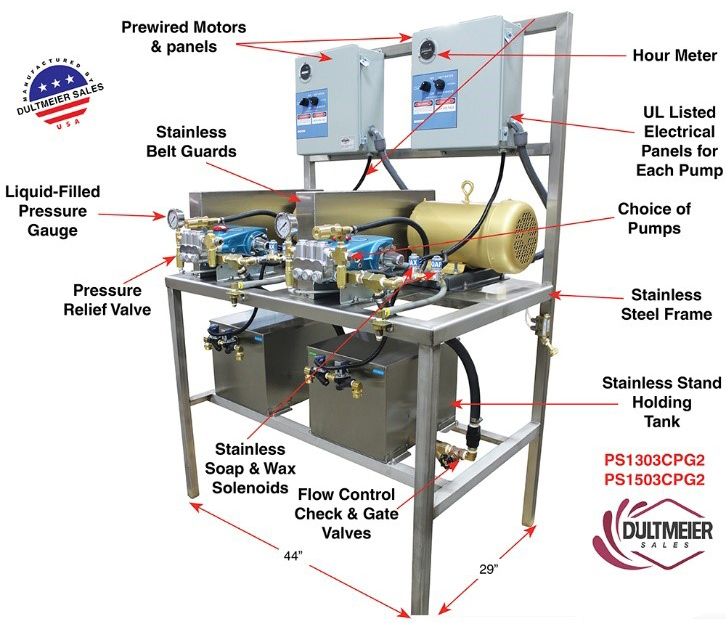
Prebuilt Chemical Mix Unit: Quick Chem-Mix
Assembling one of these units can be done fairly easily. You can configure it to work with your current chemical mixing station or sprayer nurse trailer. However, it does take a bit of time to build and wire the meter and display correctly. This is why Dultmeier offers ready-to-go systems.
The Dultmeier Quick Chem-Mix system (Part number DUCHEM-MIX) is a complete chemical mixing manifold, meter, and display plumbed together on a stainless steel stand. It can be easily incorporated into your nurse trailer or a stationary mixing location.
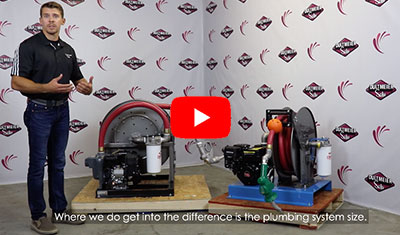
Dultmeier Quick Chem-Mix Video
There are two separate versions: with inductor assembly and without the inductor assembly. The full unit with venturi inductor (no tank) is ready to go, all you need is to install it on the discharge side of your transfer pump and connect your mini-bulk/shuttle tanks and you are ready to go:
If you want to use it with an existing cone bottom tank and inductor you already have or use the suction of your pump, use the system without the inductor. You just connect the outlet to the inlet of your pump:
Remember that the Quick Chem-Mix units without inductor will require you to plumb a separate freshwater rinse line to the manifold “stack”.
Quick Chem-Mix Benefits
- Ability to pull chemicals from 20 feet or more depending on your setup
- Meter up to six individual chemicals
- One flowmeter for all products. There is no need to calibrate the meter for each product
- The rinse feature ensures all product is flushed out of the manifold
- Easy to plumb into existing inductor cones with minimal plumbing
- No 12-Volt mini-bulk pumps, just a single transfer pump is needed
- Available with 2 or 3-inch inductor assembly, also available without inductor assembly if you already have a cone bottom tank with inductor
- NEMA-rated weatherproof enclosure protects the display
Testing the Quick Chem-Mix System
More Than One Way to Get the Job Done
There are several effective options for mixing mini-bulk chemicals. The setup you choose depends on your preferences and budget. Whether you assemble it yourself or use the Quick Chem-Mix, this system offers an inexpensive way to conveniently mix multiple products without handling several chemical pumps and hoses.
If you prefer a more automated system be sure to check out the Dura Auto-Batch System

Tech Ag & Industrial Sales
Shane Blomendahl is a tech sales veteran at Dultmeier Sales with over 10+ years of experience in liquid handling products covering several industries and applications.


